Thursday, March 20, 2014

Recipe: Soy Curl 'Chicken' Salad


I enjoyed my 'chicken' salad atop some cilantro. I added some mashed avocado to the other piece of toast and drizzled some chipotle hot sauce over the salad. This salad includes grapes, sweet corn, black olives, tomatoes, curry powder, and onions.

This hearty 'chicken' salad features dehydrated soy curls by Butler Foods. Once re-hydrated, these pieces of non-GMO soy have the texture of shredded chicken. You can impart any flavor you want onto the soy curls by soaking them in a flavored broth or adding seasoning after they plump up. They also get a nice crunch on the outside when pan seared in a little oil. Just be sure to squeeze out as much liquid as possible after the curls are re-hydrated.

Soy Curl 'Chicken' Salad

Ingredients: 
2 cups dry soy curls
3 cups of vegan chicken broth (I used two cubes of Not Chick'n Bouillon)
1 cup of grapes halved and then quartered
1/2 cup of minced onion
1/2 cup of chopped nuts (I used cashews)
1/2 cup of chopped tomatoes
1/2 cup of sliced black olives
1/2 cup of frozen sweet corn kernels, thawed
1/4 cup of sweet relish
1/2 cup to 3/4 cup of vegan mayonnaise 
1 tablespoon of BeeFree Honee
1 tablespoon of prepared mustard
1 to 2 tsp. of curry powder to your taste
Splash of fresh lemon juice (I used half a small lemon)
Black pepper (I didn't need salt, but you can add some if you want)

Directions:
Re-hydrate the soy curls in 3 cups of hot vegan chicken broth. Allow to sit for at least 10 minutes while you prep the rest of the ingredients. In a bowl, combine the grapes, onion, nuts, tomatoes, black olives, and corn.

In a separate bowl, combine the vegan mayonnaise, BeeFree Honee, mustard, relish, curry powder, pepper, and lemon juice. Taste and adjust seasonings to your preference. Pour the sauce over the other ingredients and mix well.

Drain the soy curls very well and add to the bowl of ingredients. Mix well and chill until ready to eat. 

**If you want your soy curls to have some added texture, pan fry the curls in a little oil until the edges are crispy and then add to the sauce and other ingredients.


The soy curls re-hydrating


The finished "chicken" salad featuring Butler's Soy Curls.

Wednesday, March 19, 2014

Review: Coloring "Eggs" for Easter with EggNots


Pictured are recently dyed EggNots.

My son has been begging to color eggs for Easter, so I told him to be patient while the "eggs" arrive in the mail.

Instead of buying eggs from the grocery store, I ordered mine from a company called EggNots. The company makes ceramic eggs for people with egg allergies or who have an aversion to coloring chicken eggs.

The ceramic eggs look just like chicken eggs and even come in an egg cartoon. The eggs are lightweight, so you have to hold them down in the dye.

I purchased a run-of-the-mill egg dye from the store, but the EggNots come with a recipe to make your own dye using food coloring, vinegar, and water.

My son and I had a blast coloring the EggNots. What's great is that they won't spoil, and we can save the eggs to hide for next year.

"Like" the company on Facebook because they occasionally offer sales on their product.


This is how the EggNots look when they arrive.


The "eggs" dye well. 

Potato Puffs with Neat Filling


Are you a meat-and-potato person? Well, this recipe may transform you into a Neat-and-potato person!

Neat is a tasty meat replacement product that currently comes in three flavors: Mexican, Italian, and Original. The company is set to release a breakfast sausage flavor in the near future.

I love this Potato Puff recipe because it’s easily tailored to your family’s tastes. You can choose what Neat favor you use in the filling, as well as other ingredients that you tuck inside the mashed-potato balls.

For this recipe, I used Mexican Neat, onions, grape tomatoes, and homemade baked almond feta as my filling. You could add/swap in peas, green olives, corn, green chilies, or anything else you desire.

Another great thing about this recipe is that you can assemble the potato puffs ahead of time, keep them refrigerated, and then fry them later when you’re ready to eat.

NEAT POTATO PUFFS 
(Makes 6 large potato balls)

Ingredients:
3 large red potatoes, peeled and chopped
1 small onion, chopped
2 T oil
1 package of Mexican Neat
6 grape tomatoes
A finished batch of Baked Almond Feta (recipe here: http://www.maplespice.com/2011/04/baked-almond-feta-with-dill-oil.html)
1 c. flour
1 to 2 c. Panko bread crumbs
1 c. non-dairy milk
Oil for frying
Salt

Directions:
Steam or boil your potatoes until fork tender. While the potatoes cook, sauté the chopped onion in the oil over low to medium heat until soft, about 5-7 minutes. Sprinkle with a pinch of salt. Prepare your Neat according to the package directions and add it to the pan with the onion. Cook until the Neat easily breaks up into crumbles, about 7. Turn off the heat, and set the pan aside.


Grab a portion of your almond feta and break it into 6 pieces that measure about 1 tablespoon in size each. Slice the grape tomatoes in half.

Once the potatoes are fork tender, move the potatoes to a bowl and mash with a potato masher until lump free. Add a pinch of salt while mashing. Allow the potatoes to cool about 20 minutes.

Once the potatoes are cool enough for you to handle, grab about ½ cup of mashed potatoes and make a flat disk in the palm of your left hand (if you’re a righty). With your right hand, push down into the center of the disk as your left-hand fingers slowly rotate the disk in a clockwise motion (You want to create a little bowl).


Create a "bowl" in your palm with the mashed potatoes.


Push down on the filling as you build up the sides of the potato "bowl" by raising the edges gently with your fingers as you rotate the mashed potatoes in your palm.


When you get as high as you can with your potato "bowl" without having the filling poke out anywhere, grab some extra potato from the mashed-potato bowl and add it to the top.


Smooth out the ball with both hands.

Add 1 to 1-1/2 tablespoons of the Neat-onion mixture in the center of the potato bowl that’s cradled in your left hand. Top with a piece of almond feta and half a grape tomato (you can add more Neat, almond feta and/or the other half of the grape tomato if you think you have enough room).

As you rotate the potato bowl in your left hand, push down on the filling so the edges of the potato bowl rise. Continue this motion until the bowl is almost sealed at the top. Take about 1 to 2 tablespoons of extra mashed potato and add to the top of the potato bowl that’s in your hand. Use both hands to form the potato ball into a smooth ball. Set aside and finish the remaining puffs.

Pour the non-dairy milk into one bowl, the flour into another bowl, and the Panko bread crumbs into a third bowl. One at a time, dip a potato puff into the milk, then the flour, and then back into the milk, and finally into the Panko bread crumbs. Apply slight pressure to get the Panko to adhere all over the potato puff. Set aside, and when all the puffs are coated, place in the fridge.


Take a shallow sauce pan and fill with enough oil to come about halfway up the potato puff (You can deep-fry the puffs in more oil if you prefer, but I didn’t want to use up so much oil). Pull out one puff at a time from the fridge and pan fry it until the bottom half is golden brown (about 5-7 minutes). Keep an eye on the puffs, because as the oil gets hotter, the puffs will brown quicker. Carefully flip over the puff with a slotted spoon and fry the other half of the puff until golden brown (I found it easier to “flip” the puffs by carefully tilting the pan slightly so the puff is almost submerged in the oil – this makes it easier to nudge the puff over with the slotted spoon).

Drain the puff on a paper towel when done cooking, and sprinkle with a pinch of salt. Serve with your favorite condiment. I served my puffs with salsa, Nacho Mom’s Vegan Queso, and a little cilantro.

The puffs will be crunchy on the outside and creamy on the inside. The Mexican Neat provides a wonderful meaty texture with a little heat. The baked almond feta adds a sharp tang, while the grape tomato adds a little juiciness to each bite along with some sweetness.


My finished potato puff served with salsa and cilantro and atop Nacho Mom's Vegan Queso.

The inside of one of the potato puffs.


Another puff cut open and drizzled with Nacho Mom's Vegan Queso.

Friday, February 21, 2014

Review: Hail Merry Strawberry Macaroons and OCHO Coconut Bars


When you're craving a strawberry treat, you hope your snack tastes as delicious as this macaroon from Hail Merry. It's a perfect bite.


My Vegan Cuts Snack box contained a wonderful treat from Hail Merry. The company's strawberry macaroons are little bites of chewy goodness that are bursting with strawberry flavor. 

You get the texture of shredded coconut with every chew, but all you taste is this beautiful strawberry flavor.

I haven’t tried many raw treats, but the few I have were not tasty at all. I was expecting not to like these macaroons, but they were exceptional. I would eat these all day, every day.

Another thing to keep in mind: All products sold by Hail Merry are free of corn, soy, and starches.


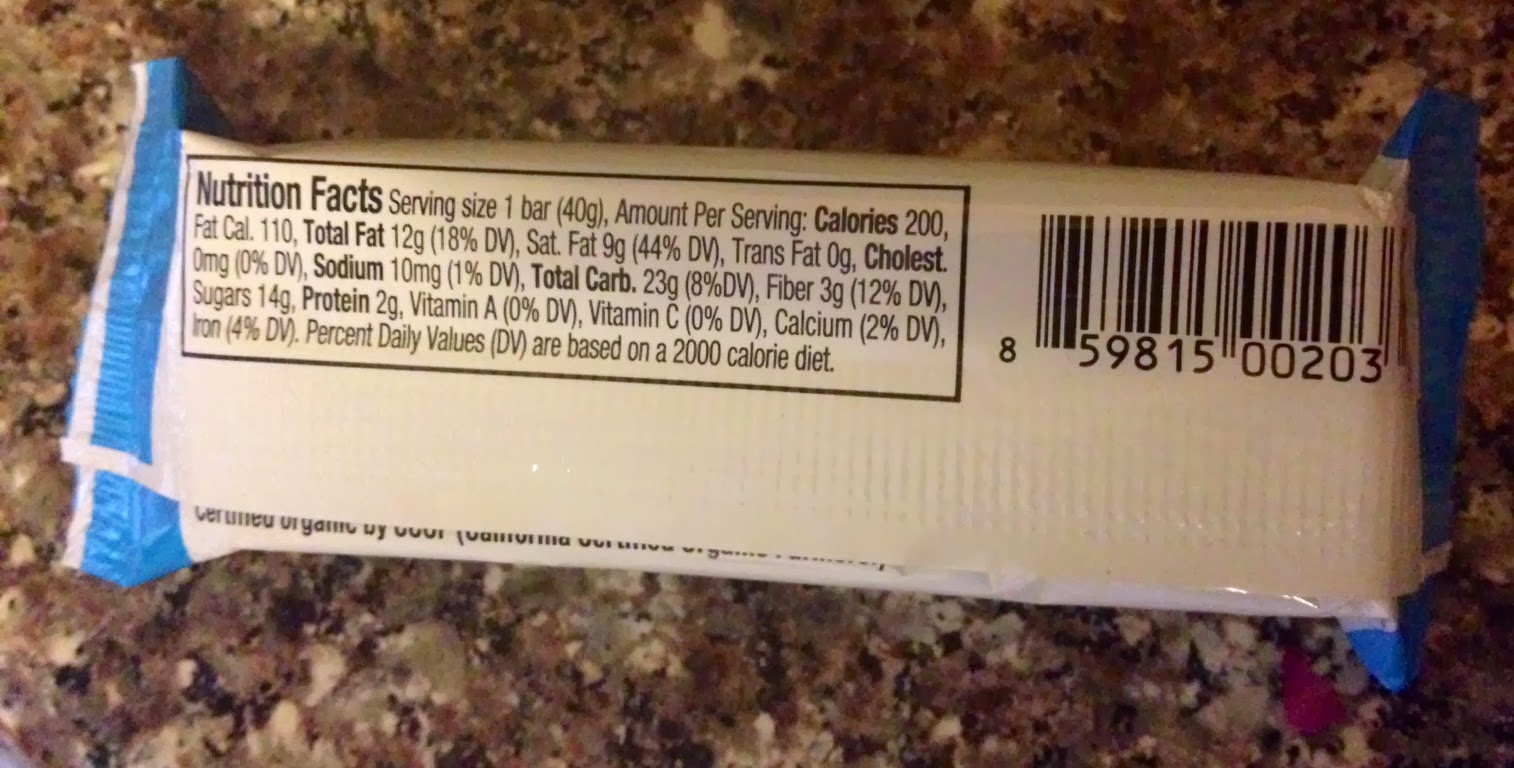
OCHO makes a scrumptious coconut dark-chocolate candy bar that's leaps and bounds better than a Hershey Mounds bar.


I purchased a box of eight OCHO Coconut Bars from Vegan Cuts. I was always a fan of Hershey's Mounds bar as a child, and when I saw these, I had to try them. It's been years -- decades even -- since I've eaten an Almond Joy or Mounds bar, but I do remember the overly sweet coconut filling and tasty chocolate shell.

The OCHO Coconut Bar did not disappoint. Not only is the product organic and vegan, but it's free of artificial preservatives and ingredients. Eat that, Hershey!

As you bite into the coconut bar, you get a slight crunch as you break the dark-chocolate shell. Then you taste the slightly sweet, gooey, coconut filling. You can feel the shredded coconut in your mouth, and the flavor is amazing. Before you know it, the bar is over, but you feel satisfied. That's not to say you don't want another bar right away, but you don't feel this addictive craving for another bar like you do with the conventional, overly sweet candy products on the market.

Well done, Hail Merry and OCHO -- well done!

Thursday, February 20, 2014

Review: Earth Balance Vegan Cheddar Kettle Chips and The Daily Crave Veggie Chips


Earth Balance Vegan Cheddar Kettle Chips are delicious and bursting with a tangy, cheesy flavor.


The Daily Crave's Veggie Chips are crispy and have a melt-in-your-mouth quality that a lot of veggie chips have. 

My Vegan Cuts Snack Box for February contained a lot of wonderful goodies -- as shown below:


The Vegan Cuts Snack Box is a subscription service that costs $19.95 a month. 

Today, I'm reviewing two chip products from my February Snack Box: Earth Balance Vegan Cheddar Kettle Chips and The Daily Crave Veggie Chips. Both products have wonderful flavors and textures. 

Here's the breakdown on each:

The Daily Crave Veggie Chips taste like the generic veggie chips from Whole Foods, so it might be hard for this brand to distinguish itself on the market. That said, it's nice to know the product has no artificial ingredients, flavors, or colorings. It's also non-GMO and free of hydrogenated fats. I have never heard of this brand prior to my snack box arriving, so I'll keep an eye for it when I go to Whole Foods.

Earth Balance Vegan Cheddar Kettle Chips have been highly anticipated by plant-based foodies on social media. These chips definitely live up to the hype. The chips are sturdy and crunchy, as you would expect a kettle chip to be. Each bite brings on a burst of tangy, cheesy goodness, so it's very difficult to have the suggested serving size of 13 chips. I plan to savor this bag as long as possible before my order of more chips from Rabbit Food Grocery arrives (I also ordered Earth Balance's new Sour Cream and Onion flavor Kettle Chips, and I have no doubt it will be amazing). 

So, if you're lucky enough to spot Earth Balance's kettle chips at the store, stock up on these babies because I'm sure they'll sell out quickly.

Wednesday, February 19, 2014

Review: Eli's Earth Organic Drinking Chocolate and Cocoa Felice Hot Cocoa Mix by Coop's MicroCreamery


These two drinking-chocolate products taste horrible on their own, but when you combine them, you get a rich and satisfying cup of cocoa.

I’m a little disappointed in the chocolate-drinking mixes by Eli’s and Coop’s MicroCreamery. Neither one left me wanting for more, but I’m sure they will be suitable as baking ingredients. Coop’s product even has a recipe for chocolate pudding on the back, and reviewers have said this pudding is tasty. I’ll try it later and report back.

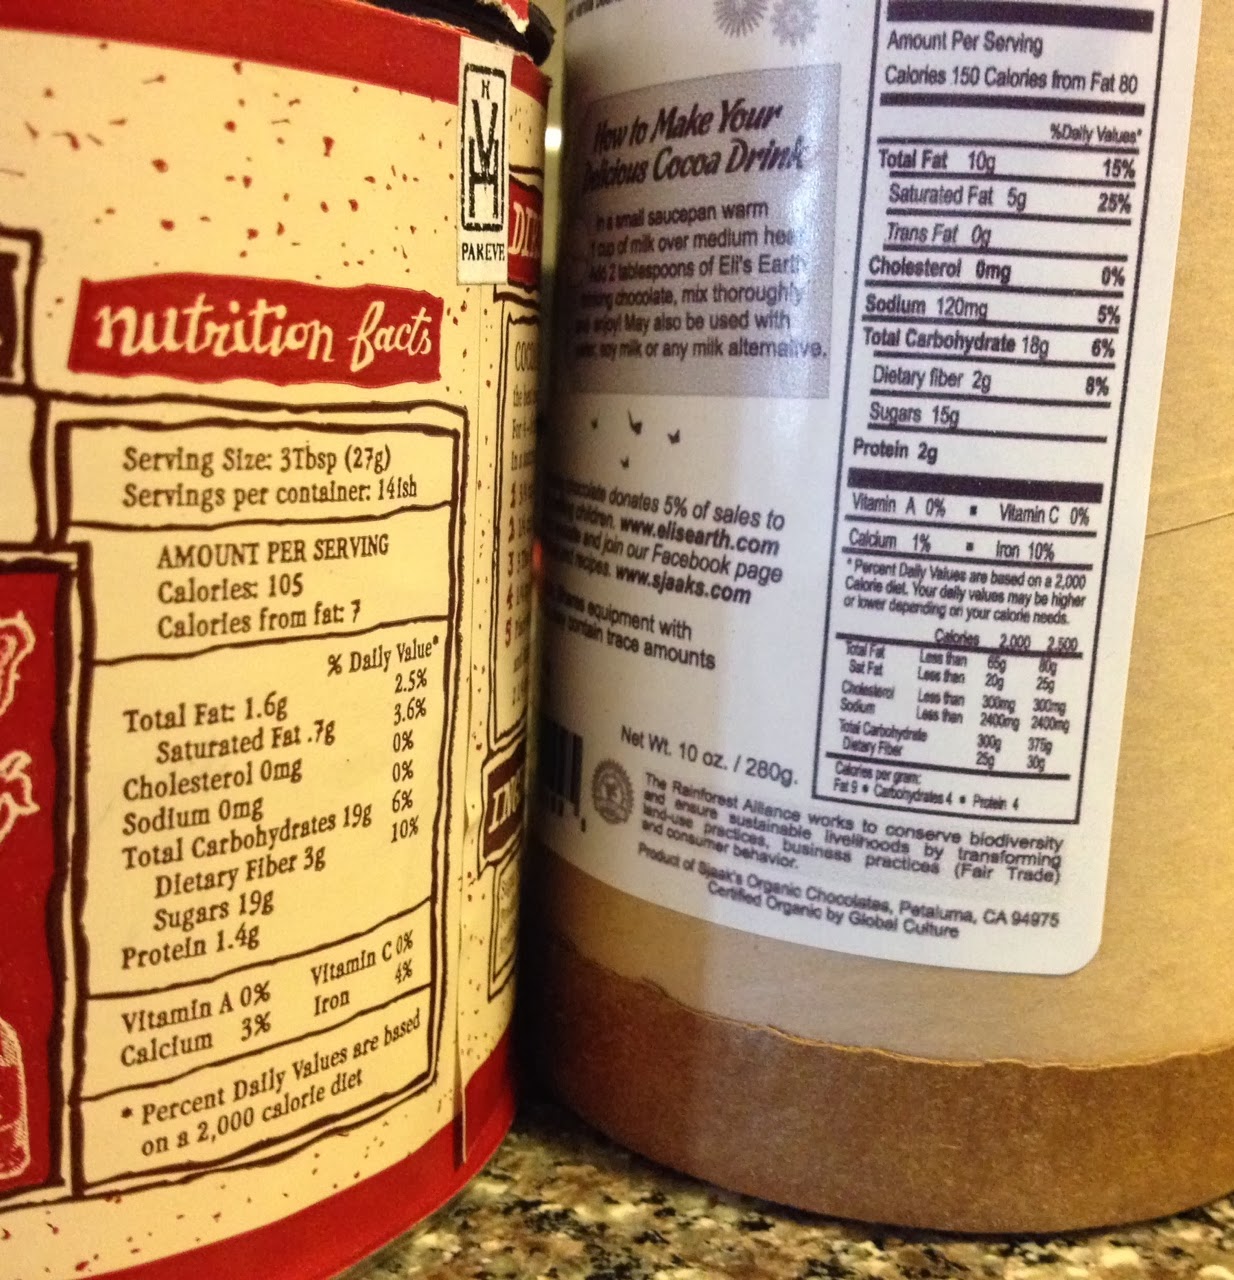
First, I’ll talk about Eli’s Earth Organic Drinking Chocolate. I purchased the milk-style flavor, but there’s also dark chocolate, almond, and hazelnut. One of those other flavors might be tastier than the milk-style, but I don’t intend to purchase them to find out. 

The good:
Eli’s Earth donates 5 percent of sales to non-profits that benefit children.

The bad:
There is hardly any chocolate flavor. There are scratch-and-sniff stickers that give off more chocolate essence than this drink. I followed the directions, which stated warming up 1 cup of milk and adding 2 tablespoons of the drink mix. I was interested in purchasing the almond or dark chocolate mix, but because I was buying this product for my young son, I thought the milk-style would be more inviting to his palette. I think this is definitely a drink for older children and adults because there’s no sweetness to it. And believe me, I don’t like overly sugary things, but this didn’t have any sweetness. I checked the label, and there are 15 grams of sugar in the product. Perhaps if you used a sweetened non-dairy milk (I used unsweetened), you’d enjoy the flavor more.

Next, is Cocoa Felice Hot Cocoa Mix by Coop's MicroCreamery. This only comes in one flavor.

The good: 
It’s twice the size (22 ounces) and $2.50 cheaper than Eli’s, which is 10 ounces and $12.99. 

The bad:
Talk about a complete opposite from the other product – this mix produces such a sweet-tasting drink that even my son didn’t like it. The recipe calls for adding 2 tablespoons to 3 tablespoons of mix to 1 cup of warmed up milk. I first made it with 3 tablespoons – big mistake! As I stated, it was way too sweet. My son eventually drank about half because I put in some Dandies mini marshmallows in it, and I spooned him the drink with the marshmallows. I had to dump out the rest. I made a second cup later and only used 2 tablespoons, and the drink was definitely more palatable. It was still too sweet, so I poured it into the mug with the Eli’s drink. 

These two drinks, when mixed together, produce a very nice mug of hot cocoa. There’s a deep rich cocoa flavor that’s highlighted with a hint of sweetness. Too bad you have to buy both products to achieve this tasty result.