Showing posts with label recipe. Show all posts

Sunday, September 28, 2014

Recipe: Baked Portobello Mushroom Caps with Tahini


The assembled mushroom caps: toppings include sliced garlic, chopped green onions, tomatoes, and tahini.

These baked mushroom caps burst with bold flavors and are a favorite dinner item in my household. Serve with a side of quinoa or rice, as well as some fresh pineapple chunks.

Baked Portobello Mushroom Caps with Tahini

Ingredients:
Portobello Mushroom Caps (I like to keep most of the stem and the gills)
2-3 green onions (scallions), chopped
1 garlic clove per mushroom cap (thinly slice each clove)
1-2 tomatoes (a few chopped pieces per mushroom cap)
salt and pepper
Other favorite seasonings: I used Italian seasonings and onion powder
Tahini (ground sesame seeds; I find tubs/jars of tahini near the peanut butter at the store)
Organic sweet chili sauce or a vegan liquid sweetener of choice

Procedure:
Preheat the oven to 350 degrees. Lightly grease a baking dish. Take a paper towel and brush off the tops of the mushroom caps to remove any dirt. I don't recommend washing the mushrooms because they absorb water.

Place the mushroom caps on the baking dish gill-side up. Sprinkle with a pinch a salt on each cap. Add sprinkles of your favorite seasonings, such as Italian herbs or onion powder, etc.


Spoon about 1T of sweet chili sauce or other liquid sweetener on the mushroom. If you want to use organic sugar or coconut sugar, just use a generous pinch around the mushroom.

Next, layer your toppings: I lay the sliced garlic around the mushroom stem, then the tomatoes, and then the green onions.

Finally, I spoon about 1T of tahini around the mushroom stem.

Bake the mushrooms for 25 minutes. The mushrooms get slightly tender, darker, and soak up all the flavors from the toppings. The tahini adds a slightly bitter taste that compliments the savory essence of the mushroom. The seasonings, tomatoes, garlic, and green onions add punches of flavor, enticing aromas, and slight crunches here and there. As you slice the mushroom over your rice and pineapple, you get a nice mix of sweet, savory, tangy, bitter, and salty tastes.

These veggie steaks are filling and delicious.


I baked my mushrooms with some asparagus that I sprinkled with salt and a few drops of olive oil.


These cooked mushroom caps (above and below) are from other times I made this recipe. My husband and I ate the other mushrooms pictured on the baking sheet before I could take photos -- we were hungry :) 


Monday, September 22, 2014

Recipe: Vegan Chocolate Bacon Bites


Ice cube trays give you a perfect nugget of chocolate-covered vegan-bacon.

My husband almost always needs to end his dinner with a dessert, so I wanted to surprise him with a new chocolaty treat that I put together one lazy afternoon.

These vegan chocolate bacon bites are easy to make and can be customized to suit your loved one's tastes. I had some bags of Phoney Baloney's Coconut Bacon sitting in my pantry, and I wanted to incorporate their salty goodness into a recipe. What better place to put these cruelty-free bacon bits in than in some rich chocolate!

VEGAN CHOCOLATE BACON BITES

Ingredients:
2 cups of vegan semi-sweet chocolate chips, such as Enjoy Life
1 teaspoon of cinnamon (I had apple pie spice lying around, so I used that)
1 teaspoon of cardamom powder (optional)
1/4 teaspoon to 1 teaspoon of cayenne (optional)
1 teaspoon of coconut oil
Salt
2 teaspoons of Magic Vegan Bacon Grease (optional)
Phoney Baloney Coconut Bacon (you can use one flavor or a mix of flavors)
Vegan sprinkles (optional)
Ice cube trays
Cooking spray
Pot of boiling water
Glass bowl

Instructions:
First, lightly grease two ice cube trays. Add some coconut bacon to the bottom of each ice-cube section. It was about 1/2 teaspoon to 1 teaspoon of flakes per section. You just want to fill about 1/3 of the section.


Next, melt your chocolate chips. I boiled a couple inches of water in a pot and placed a glass bowl over the mouth of the pot once the water was boiling and I had turned the stove off. In the bowl I had the chocolate chips, the spices (cinnamon, cardamom, cayenne, and a pinch of salt), and the coconut oil. Don't add the Magic Vegan Bacon Grease yet -- I find that the vegan bacon grease tastes better when stirred in at the very end.


Add the vegan bacon grease right before you spoon your chocolate mixture into the ice cube trays.

As the chocolate melts, stir the mixture until it's completely smooth. Then, add the Magic Vegan Bacon Grease, making sure to include the bacony bits at the bottom of the jar (if the contents have melted). Vegan bacon grease is comprised of coconut oil, so depending on the temperature of your kitchen, the contents of the jar could be melted or in a solid state.

Carefully spoon about 1 tablespoon of chocolate into each section of the ice-cube tray. Go back and fill each section if you have leftover chocolate. You want each section to be half full of the chocolate and coconut bacon mixture. Don't worry if you don't have enough chocolate or if you filled each section too much and ran out...you can either make more chocolate sauce or just fill one ice cube tray.


Gently shake the ice cube trays to settle the chocolate into the coconut bacon and to make the tops a little smoother. I like to sprinkle a little salt on top of each section, as well as some organic vegan sprinkles.


Vegan sprinkles add a little crunch to each bite.

Stick the trays in the freezer, and the chocolate hardens within 10 minutes thanks to the coconut oil. They should pop out easily, but if not, just take a knife around the edges. The chocolate pieces melt quickly in your warm fingers, so keep that in mind when you're handling the candy.

I empty the chocolate pieces into a Tupperware and keep it in the fridge for my husband to grab one or two treats whenever he has a craving for something sweet. The semi-sweet chocolate is rich and smooth, and you get bursts of salty goodness from the coconut bacon and pinch of salt on the surface of the candy. The sprinkles also add a nice crunch with each bite.


As I stated earlier, you can add whatever spices you want. Definitely leave out the cayenne if your family doesn't like spicy food. The cayenne adds a little heat that you feel in the back of your throat -- you don't feel it on your tongue. Consider adding peppermint extract for a nice minty treat, or filling the tray with vegan cookie pieces or vegan mini marshmallows.

Tuesday, September 9, 2014

Recipe: Crispy Breaded Avocado Wedges


These crispy avocado wedges taste wonderful in tacos with a tangy slaw and a sauce made from vegan mayo and sriracha. 

I was watching a food truck show on TV the other day, and a dish caught my eye. One food truck was serving deep fried avocado tacos. The entire process looked so simple that I thought I'd give it a try. You can Google such terms as "fried avocado," "deep-fried avocado," and "crispy avocado tacos" to find a variety of recipes. 

All you basically need are slightly ripe avocados, a batter, panko crumbs, lime juice, and oil. 


Here's what I used:
  • 1 large slightly ripe avocado (you don't want a very ripe/squishy avocado)
  • 1 or 2 limes
  • Pancake or French toast mix
  • Non-dairy milk or water
  • Panko crumbs
  • Salt to season with at the end
  • Vegetable oil
I used a medium-sized pot that could easily hold 4 to 5 wedges. I added about an inch-high worth of oil, and I set the flame at medium. 

In one bowl, I made my batter. I had some Mom's Vegan Kitchen French Toast Mix in my pantry, and I mixed about 1/2 cup of the mix with the juice of one lime and then enough non-dairy milk to make a thick batter that was like a cake batter. If the batter is too runny, just add more mix. You want the batter to really cling to the avocado. 

In a second bowl, I poured 2 cups of Panko crumbs (You can add more Panko as needed). 

I then cut my avocado in half, removed the pit, and peeled off the skin (I don't use a spoon to scoop out the flesh -- I find it easier to just peel the skin off). Each half of the avocado should give you four good wedge slices. If your avocado is medium or small, you'll get three wedges per half. 

I then dredged each wedge in the batter then Panko and then carefully set each wedge in the oil. I lowered the heat as needed if I noticed the breading getting too dark. After about a minute, I could see the bottom of the wedges getting golden brown. I then took my tongs and carefully flipped them over. I let them cook another minute or so until that side was golden brown. 

Have a plate with paper towels nearby so you can drain the wedges as you pull them out. Sprinkle a pinch of salt on each wedge as soon as they are sitting on the plate so the salt sticks to the oil on the Panko. 

I then finished cooking my last set of four wedges. 

These fried avocados taste wonderful when hot, so before frying them, have your taco or sandwich ingredients ready so you can assemble your meal as soon as your avocados are done. 

If some part of your wedge, such as the curved side, needs some browning, you can cook that side as needed. Some wedges are thinner (the ends), so one minute per side is usually enough. But the larger middle wedges might need another side in the oil for a minute. 


As I ate my crispy avocado tacos, it felt as if I were eating a nice breaded fish taco. The avocado was not overpowering in flavor, but was warm and creamy under the very crunchy and nicely seasoned Panko breading. My batter was slightly sweet and spiced (due to the ingredients in the French toast mix), but it wasn't overly sweet. It added a nice flavor to my taco. 

The whole recipe doesn't take more than 10 to 15 minutes to complete. It's all basically prep work: having your batter and bread crumbs ready, slicing your avocado, and having the oil hot enough. 

If you prefer not to fry your avocados, some recipes stated that said you could preheat your oven to 400 degrees and then generously spray your dredged wedges with cooking spray and then bake them for 15 to 20 minutes, turning them over halfway through cooking. I plan to try this method as well, but so far I've only fried my avocados. 

I've done this recipe twice, and I have found it to be simple and with delicious results. My tacos contained cilantro, a zesty crunchy slaw, a little sriracha mayo, and fresh lime juice. All this with the warm, crunchy avocado wedges was heaven in my mouth.

Thursday, March 20, 2014

Recipe: Soy Curl 'Chicken' Salad


I enjoyed my 'chicken' salad atop some cilantro. I added some mashed avocado to the other piece of toast and drizzled some chipotle hot sauce over the salad. This salad includes grapes, sweet corn, black olives, tomatoes, curry powder, and onions.

This hearty 'chicken' salad features dehydrated soy curls by Butler Foods. Once re-hydrated, these pieces of non-GMO soy have the texture of shredded chicken. You can impart any flavor you want onto the soy curls by soaking them in a flavored broth or adding seasoning after they plump up. They also get a nice crunch on the outside when pan seared in a little oil. Just be sure to squeeze out as much liquid as possible after the curls are re-hydrated.

Soy Curl 'Chicken' Salad

Ingredients: 
2 cups dry soy curls
3 cups of vegan chicken broth (I used two cubes of Not Chick'n Bouillon)
1 cup of grapes halved and then quartered
1/2 cup of minced onion
1/2 cup of chopped nuts (I used cashews)
1/2 cup of chopped tomatoes
1/2 cup of sliced black olives
1/2 cup of frozen sweet corn kernels, thawed
1/4 cup of sweet relish
1/2 cup to 3/4 cup of vegan mayonnaise 
1 tablespoon of BeeFree Honee
1 tablespoon of prepared mustard
1 to 2 tsp. of curry powder to your taste
Splash of fresh lemon juice (I used half a small lemon)
Black pepper (I didn't need salt, but you can add some if you want)

Directions:
Re-hydrate the soy curls in 3 cups of hot vegan chicken broth. Allow to sit for at least 10 minutes while you prep the rest of the ingredients. In a bowl, combine the grapes, onion, nuts, tomatoes, black olives, and corn.

In a separate bowl, combine the vegan mayonnaise, BeeFree Honee, mustard, relish, curry powder, pepper, and lemon juice. Taste and adjust seasonings to your preference. Pour the sauce over the other ingredients and mix well.

Drain the soy curls very well and add to the bowl of ingredients. Mix well and chill until ready to eat. 

**If you want your soy curls to have some added texture, pan fry the curls in a little oil until the edges are crispy and then add to the sauce and other ingredients.


The soy curls re-hydrating


The finished "chicken" salad featuring Butler's Soy Curls.

Wednesday, March 19, 2014

Potato Puffs with Neat Filling


Are you a meat-and-potato person? Well, this recipe may transform you into a Neat-and-potato person!

Neat is a tasty meat replacement product that currently comes in three flavors: Mexican, Italian, and Original. The company is set to release a breakfast sausage flavor in the near future.

I love this Potato Puff recipe because it’s easily tailored to your family’s tastes. You can choose what Neat favor you use in the filling, as well as other ingredients that you tuck inside the mashed-potato balls.

For this recipe, I used Mexican Neat, onions, grape tomatoes, and homemade baked almond feta as my filling. You could add/swap in peas, green olives, corn, green chilies, or anything else you desire.

Another great thing about this recipe is that you can assemble the potato puffs ahead of time, keep them refrigerated, and then fry them later when you’re ready to eat.

NEAT POTATO PUFFS 
(Makes 6 large potato balls)

Ingredients:
3 large red potatoes, peeled and chopped
1 small onion, chopped
2 T oil
1 package of Mexican Neat
6 grape tomatoes
A finished batch of Baked Almond Feta (recipe here: http://www.maplespice.com/2011/04/baked-almond-feta-with-dill-oil.html)
1 c. flour
1 to 2 c. Panko bread crumbs
1 c. non-dairy milk
Oil for frying
Salt

Directions:
Steam or boil your potatoes until fork tender. While the potatoes cook, sauté the chopped onion in the oil over low to medium heat until soft, about 5-7 minutes. Sprinkle with a pinch of salt. Prepare your Neat according to the package directions and add it to the pan with the onion. Cook until the Neat easily breaks up into crumbles, about 7. Turn off the heat, and set the pan aside.


Grab a portion of your almond feta and break it into 6 pieces that measure about 1 tablespoon in size each. Slice the grape tomatoes in half.

Once the potatoes are fork tender, move the potatoes to a bowl and mash with a potato masher until lump free. Add a pinch of salt while mashing. Allow the potatoes to cool about 20 minutes.

Once the potatoes are cool enough for you to handle, grab about ½ cup of mashed potatoes and make a flat disk in the palm of your left hand (if you’re a righty). With your right hand, push down into the center of the disk as your left-hand fingers slowly rotate the disk in a clockwise motion (You want to create a little bowl).


Create a "bowl" in your palm with the mashed potatoes.


Push down on the filling as you build up the sides of the potato "bowl" by raising the edges gently with your fingers as you rotate the mashed potatoes in your palm.


When you get as high as you can with your potato "bowl" without having the filling poke out anywhere, grab some extra potato from the mashed-potato bowl and add it to the top.


Smooth out the ball with both hands.

Add 1 to 1-1/2 tablespoons of the Neat-onion mixture in the center of the potato bowl that’s cradled in your left hand. Top with a piece of almond feta and half a grape tomato (you can add more Neat, almond feta and/or the other half of the grape tomato if you think you have enough room).

As you rotate the potato bowl in your left hand, push down on the filling so the edges of the potato bowl rise. Continue this motion until the bowl is almost sealed at the top. Take about 1 to 2 tablespoons of extra mashed potato and add to the top of the potato bowl that’s in your hand. Use both hands to form the potato ball into a smooth ball. Set aside and finish the remaining puffs.

Pour the non-dairy milk into one bowl, the flour into another bowl, and the Panko bread crumbs into a third bowl. One at a time, dip a potato puff into the milk, then the flour, and then back into the milk, and finally into the Panko bread crumbs. Apply slight pressure to get the Panko to adhere all over the potato puff. Set aside, and when all the puffs are coated, place in the fridge.


Take a shallow sauce pan and fill with enough oil to come about halfway up the potato puff (You can deep-fry the puffs in more oil if you prefer, but I didn’t want to use up so much oil). Pull out one puff at a time from the fridge and pan fry it until the bottom half is golden brown (about 5-7 minutes). Keep an eye on the puffs, because as the oil gets hotter, the puffs will brown quicker. Carefully flip over the puff with a slotted spoon and fry the other half of the puff until golden brown (I found it easier to “flip” the puffs by carefully tilting the pan slightly so the puff is almost submerged in the oil – this makes it easier to nudge the puff over with the slotted spoon).

Drain the puff on a paper towel when done cooking, and sprinkle with a pinch of salt. Serve with your favorite condiment. I served my puffs with salsa, Nacho Mom’s Vegan Queso, and a little cilantro.

The puffs will be crunchy on the outside and creamy on the inside. The Mexican Neat provides a wonderful meaty texture with a little heat. The baked almond feta adds a sharp tang, while the grape tomato adds a little juiciness to each bite along with some sweetness.


My finished potato puff served with salsa and cilantro and atop Nacho Mom's Vegan Queso.

The inside of one of the potato puffs.


Another puff cut open and drizzled with Nacho Mom's Vegan Queso.

Tuesday, February 18, 2014

Review: Vegan Shelf-Stable Bacons

photo comes from my Instagram feed
Vegan bacon products can add a salty, smoky crunch to hors d'oeuvres, such as this date appetizer. Medjool dates stuffed with Tofutti cream cheese. I mixed 2T of cream cheese with one thinly sliced green onion, 2T of chopped water chestnuts (for texture), and a pinch of salt and pepper. I topped the dates with a few pieces of Phoney Baloney's Coconut Bacon.


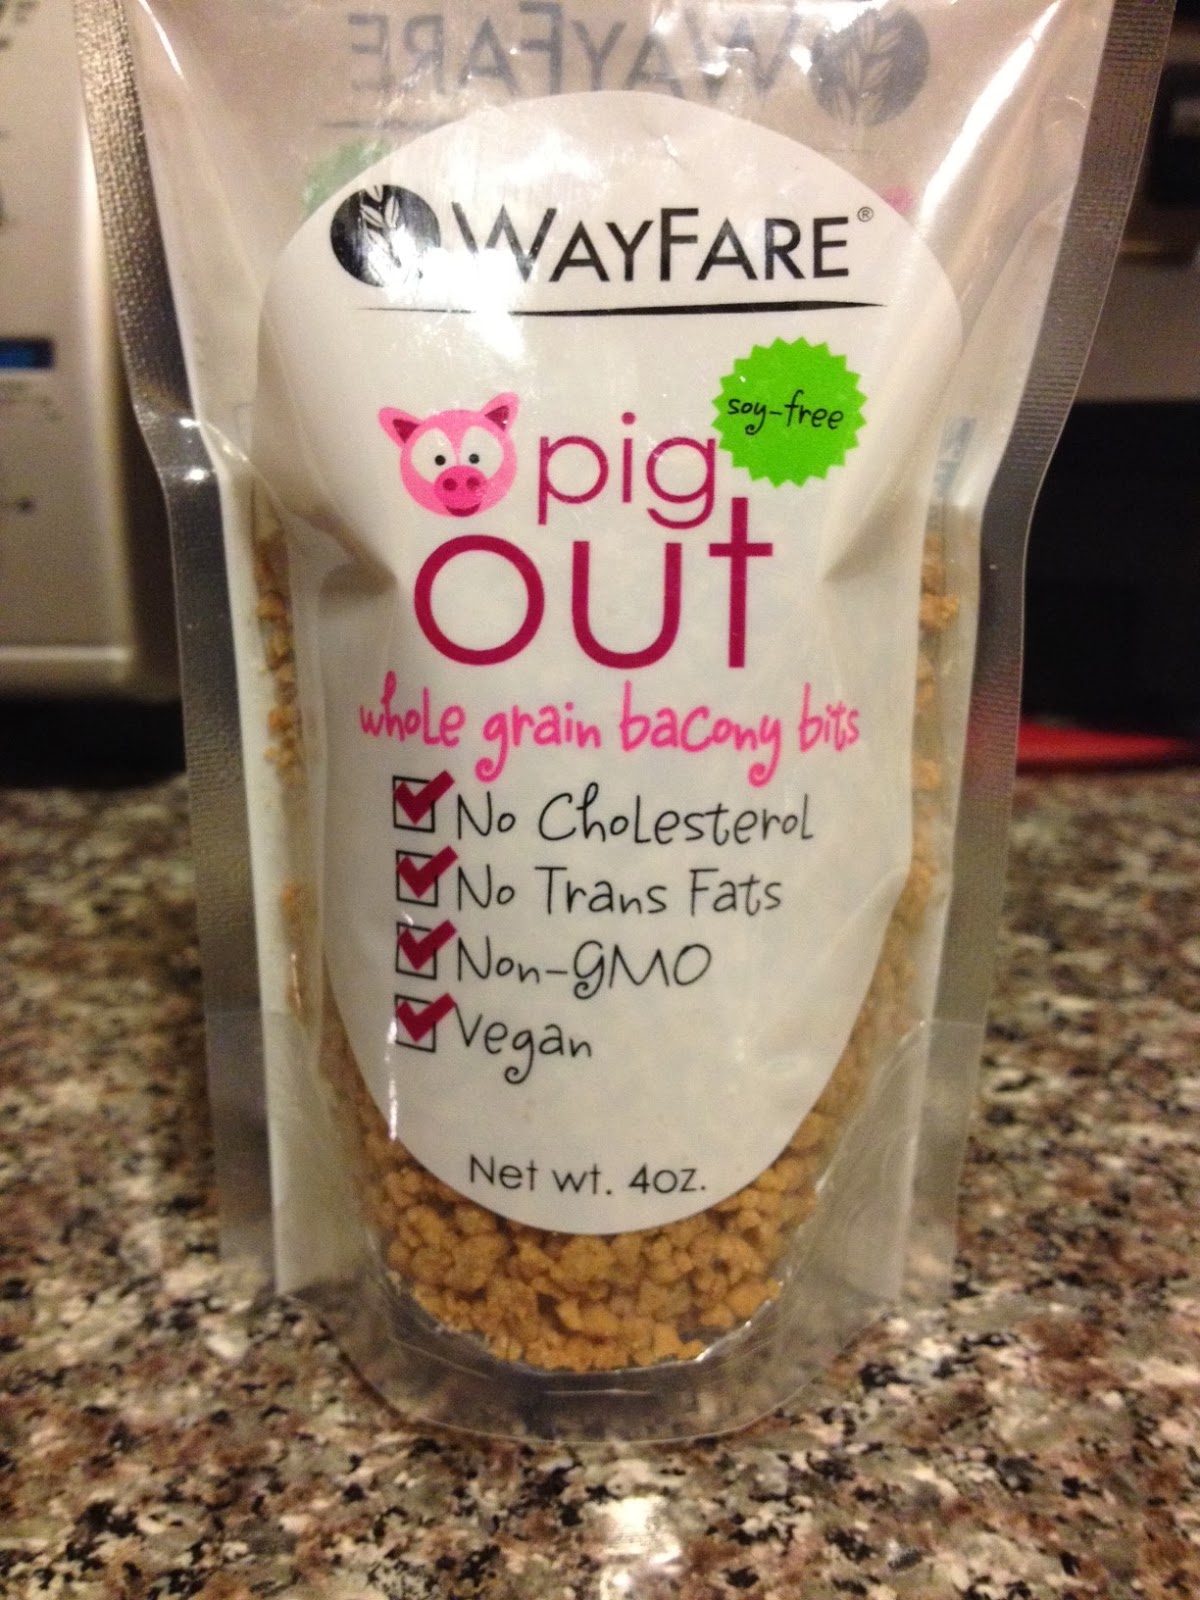
WayFare'S Bacony Bits add a great crunch and a slightly smoky flavor to each bite of this pasta salad. To make the pasta salad, cook 1 cup of pasta. In a separate bowl, mix 1/2 cup each of shredded carrots, sliced black olives, peas, sauteed mushrooms, and chopped tomatoes (you can add more or less of these ingredients to your liking). For the sauce, I mixed 1/2 cup of vegan mayo with 3 tablespoons of yellow mustard, 1 tablespoon Dijon Mustard, 1 tablespoon apple cider vinegar, 1 tablespoon maple syrup, and 1 salt and pepper to taste. I had 2 tablespoons of Tofutti cream cheese left, so I mixed that in as well for extra creaminess. Feel free to add other spices and hot sauce. 


Here are some features of both products:

  • Coconut Bacon: This gluten-free product consists of 1-inch and smaller flakes of salty, smoky goodness. Upon first bite, you taste salt, and then the flake begins to dissolve somewhat in your mouth. You taste/smell the natural hickory smoke concentrate, and you get a slight kick from the spices, which include pepper. You don't taste coconut at all. The company says their product is best consumed within six months of production and is best served as a topping because “the Coconut Bacon does not hold up well in extreme heat or moisture.” The tamari used in the coconut bacon is non-GMO. The product can be purchased on the company’s website, as well as a number of other online and brick-and-mortar retailers. See the list of sellers here.

  • Bacony Bits: This soy-free product is labeled as non-GMO. It’s extremely crunchy – almost like Grape Nuts cereal (if you’re familiar with that product). Upon first bite, you definitely know you’re eating bacon bits. It tastes similar to the bacon-bit products you might have tried from large commercial manufacturers. The bits are salty, but not as salty as the coconut bacon, and there’s a great smoky aftertaste that comes from the hickory smoke powder. Reviewers have said that it’s easy to snack on the product straight from the bag, and I can see why – its crunchy texture is addicting and the smoky aftertaste is satisfying. This product can be purchased from online retailers, including: veganessentials.com, vegancuts.com, and rabbitfoodgrocery.com.


I find that both products have room in the vegan-bacon market. Those who need a soy-free product can utilize the bacon bits, while those who can’t consume gluten can enjoy the coconut bacon. Phoney Baloney’s Coconut Bacon adds a nice, slight crunch and salty-smoky flavor in tomato sandwiches and as a topping on hors d'oeuvres. WayFare’s Bacony Bits keep its crunchy texture longer than coconut bacon, so it’s great atop appetizers and as a topping on pasta salad, salad greens, and anything else you where you want to add a salty, smoky, and crunchy element.

If you don’t have any diet restrictions, I urge you to try both products. You won’t be disappointed.

Saturday, February 15, 2014

Recipe: Jackfruit 'Crab' Salad


If you can get your hands on a can of Young Green Jackfruit in a Brine, try making a mock crab salad. The mayo, spices, and flecks of nori (seaweed) give a wonderful seafood flavor that's boosted by the steamed-crab texture of the jackfruit.

Before I became vegan in 2013, I enjoyed the occasional seafood salad that you'd spread on crackers or eat as part of a sandwich. And, when it was a special occasion, I'd even jump at the chance to order a creamy lobster roll.

Now that I don't eat animals or animal-derived ingredients, I've learned how spices and certain plants can be used to mimic flavors and textures that I thought could only come from meat.


You can purchase cans of Young Green Jackfruit at Indian grocery stores or even at veganessentials.com, here. Be careful not to purchase ripe jackfruit, which is orange, sweet and resembles roasted red bell peppers. Ripe jackfruit is not good in savory dishes. Young green jackfruit has a stronger texture, yet subtle flavor.

Jackfruit is popular among vegetarians and vegans because the fruit has some chew to it and comes apart in chunks and even shreds when cut or pulled apart in certain ways. These characteristics make it a great substitute for meat in dishes. I've tried jackfruit pulled pork, for example, but it didn't really appeal to me. When I came across this recipe for jackfruit "crab" salad, I thought it might be another recipe that sounds good but doesn't taste that great.

I was wrong. Very wrong!

I find young green jackfruit to be juicy, almost like canned artichokes. And the fruit still retains some of that juiciness even if you push out as much liquid from it as possible. Because of this, jackfruit is a wonderful substitute for crab and lobster, which has a tender, juicy flesh when cooked.

When the jackfruit is mixed with mayo and the seasonings used with seafood, you'll think you're biting into a traditional seafood salad sandwich or even a lobster roll. This vegan version is cruelty-free and affordable food at its finest.

Jackfruit “Crab” Salad
Serves 4
(Inspired by this recipe from a blog at Vegetarian Times)

Ingredients:
1 20-oz. can Young Green Jackfruit in Brine, rinsed and squeezed dry as much as possible (about 1 cup)
2-4 tablespoons of Vegenaise or other vegan mayo (start out with 2T and add more if desired)
¼ cup fresh minced onion
2 teaspoons of dried minced onion (what you find in the spice aisle)
¼ tsp. dulse flakes or powder (I used a folded piece of nori [seaweed] -- what you use for sushi -- and grated it for powder/flakes) This ingredient is necessary for a seafood flavor.
1-2 teaspoons of Old Bay Seasoning
½ tsp. curry powder
Salt and pepper to taste

Directions:
Chop the drained jackfruit with a knife until it resembles lump crab meat. Next, mix the jackfruit and all the other ingredients in a bowl. Before serving, sprinkle on a little paprika, dried parsley (I didn't have fresh), and fresh lemon juice.


The chopped jackfruit. You can see the yellowish seeds of the fruit, which are soft.


The chopped jackfruit mixed with the remaining ingredients.


Before serving, I added a little extra nori powder/flakes, some dried parsley, paprika, and a splash of fresh lemon juice.


This mock crab salad -- that even mimicked the flavor of a lobster roll -- tasted creamy, slightly sweet, salty, fishy (from the seaweed), and just plain awesome. 

Friday, February 7, 2014

Recipe: Vegan Sloppy Joes


My finished Sloppy Joe, which is comprised of a homemade sauce mixed with Neat Meat Replacement's Original flavor. 

When I was younger, Sloppy Joes were a favorite meal in my household. My mom would buy a can of Manwich sauce and mix that with some cooked ground beef. As a sandwich, the mixture was sweet, tangy, and messy -- everything a kid loves.

I just saw a commercial on TV for the Manwich sauce, and I thought about making my family some Sloppy Joes for dinner. I made a sauce from ingredients I had around the house, and I used Neat Original Mix as the protein base (It's a product that's gluten-free and soy-free, and it can be prepared vegan-style by using an egg substitute, such as Ener-G).

Vegan Sloppy Joes

Sauce Ingredients: (You can double the recipe if you like your sandwiches extra saucy)
  • ¼ c water
  • ½ c organic ketchup
  • 1 tsp mustard
  • 1 tablespoon coconut palm sugar (or brown sugar)
  • 1 tsp vegan Worcestershire sauce
  • ½ tsp garlic powder
  • ½ tsp onion powder
  • 1 tsp sriracha (I used Sky Valley Organic Sriracha)
  • 1 tablespoon apple cider vinegar
  • 1 tablespoon dried minced onion (from spice aisle)
  • Pinch of salt
Directions:

Whisk together all the sauce ingredients and set aside. Prepare the Original Neat Mix per the directions, and when the Neat is finished cooking (it will resemble ground-beef crumbles), turn off the stove and stir in the Sloppy Joe sauce. Serve on toast or buns. I didn't have any veggies around, but you can add some diced bell peppers, carrots, and/or celery that you sauteed separately in another pan. 


A closeup of the Neat mixture after it's been cooked and just after I stirred in the Sloppy Joe sauce. 

It's best to add the sauce to the Neat mixture at the very end so the Neat holds its form and texture, which is important if you want an authentic Sloppy Joe.

Saturday, February 1, 2014

Recipe: Vegan Sooji Halwa with Pineapples and Pistachios


This Indian dish is nutty, slightly sweet, and has a lovely aroma from the cardamom.

Sooji is another term for cream of wheat. When my mother and mother-in-law visit, they always make a breakfast entree or dessert using Sooji, which can be found at Indian grocery stores. I'm sure you can use the Cream of Wheat you find at the store as long as the only ingredient listed on the box is wheat. 

I made a dessert out of the Sooji last night using pineapples and chopped pistachios. I found the recipe here

To make the dish more savory, you can sautee some finely chopped onions and add it to the sooji halwa along with some chopped tomatoes and a little cilantro. You can substitute cashew halves and raisins for the pistachios and pineapple. 

Wednesday, January 29, 2014

Recipe: Creamy Potato Salad with Tofu Eggs


This potato salad is creamy, tangy, and has chunks of "tofu egg salad" in it.

Who doesn’t love a good potato salad?!

I prefer mine on the saucy side and with a bit of a tang to it. I want to taste the tender potato chunks with crunchy elements, such as chopped celery. I also like a mild pungent flavor that only green onions can provide. 

Before I became vegan, I loved chopped boiled eggs in my potato salad. I can still have that egg flavor and texture with black salt and tofu.  

Creamy Potato Salad with Tofu Eggs
(Inspired by this recipe from Kraft.

Ingredients:
1/4 c. – 1/2 c. of prepared tofu egg salad (recipe below)
3 medium-sized red potatoes cut into small chunks (I leave the skins on)
1/3 c. – 1/2 c. of vegan mayo (start with less and add more if needed)
1 tablespoon of Dijon mustard
1 tablespoon of apple cider vinegar
1/2 tsp – 1 tsp of organic sugar
4 green onions sliced thinly (include most of the green part, too)
1-2 stalks of celery sliced thinly

Directions:
Boil the potatoes until fork tender, 15-20 minutes. Drain under cold water and set aside.
Mix the mayonnaise, mustard, and vinegar. Add ½ tsp of sugar and taste. Add more sugar if you want a sweeter sauce. If you want more tang, add a little more mustard or vinegar. Add the potatoes, green onions, and celery and mix well. Fold in the tofu egg salad (add the egg mixture 1/4 c. at a time until you get the ratio and taste you prefer). If you have any vegan bacon, chop some up, pan fry until crispy, and add to the potato salad.

Tofu Egg Salad

Ingredients:
12-15 oz container of extra firm tofu
1/4 c. of vegan mayo
1 tsp of yellow mustard or 1 tsp of Dijon mustard – you can add 1 tsp of both if you like the taste of mustard
3 tablespoons of sweet pickle relish 
1 tablespoon of fresh lemon juice or 1 tablespoon of vinegar or pickle juice
1 tsp of smoked paprika
1 tsp of turmeric 
Dash of black pepper
Dash of hot sauce
1 tsp of black salt (also called Kala Namak)

Directions:

Drain your tofu and wrap it in some paper towels while you assemble your sauce. In a bowl, mix everything but the tofu together. Once all your ingredients (except the tofu) are mixed, taste it. It should be salty, tangy, and egg-like in flavor. Add the tofu, and break it up with a fork or potato masher. Make it as chunky as you like. Mix everything well and taste. Add more relish or a pinch of black salt. Be careful with the black salt; too much and your dish will be very salty.

Monday, January 27, 2014

Recipe: Borscht (Beet Soup)


This thick, sweet soup makes it easy to incorporate beets into your diet. Beets are rich in antioxidants and are heart-healthy. Read more about their benefits here.

This soup has a deep maroon color and is sweet thanks to the beets, sweet potatoes, and carrot. Adding a splash of fresh lemon juice just before serving provides a little acid to cut through the sweetness.

Borscht
(Inspired by the recipe from The Lotus and the Artichoke cookbook)

Ingredients:
3 medium beets, peeled and chopped into small pieces
2 medium sweet potatoes, peeled and chopped into small pieces
1 medium carrot, peeled and chopped into small pieces
1 small onion, chopped
2T olive oil
1T apple cider vinegar
4 cups water
1tsp salt
Garnish: fresh dill or dillweed; vegan yogurt or vegan sour cream; fresh lemon juice

Directions:

In a large pot, sautee the onion in the oil for 5 minutes. Add the chopped beets, sweet potatoes, and carrot, and cook for another 5 minutes, stirring regularly. Add the vinegar, and cook for 1 minute. Add 4 cups water, bring the water to a boil, cover the pot, and simmer until the vegetables are fork tender (about 15-25 minutes). Blend the mixture with a hand blender or blend in batches in a high-speed blender (be careful when blending hot food/liquids in a blender – allow room at the top for steam to escape). Return the pureed vegetables to the pot. Add the salt, and stir the mixture well. Taste and add salt to your liking. Serve hot with a little fresh lemon juice squeezed over the top. Garnish with a dollop of vegan sour cream or yogurt and sprinkle with fresh dill or dillweed. 


Saturday, January 25, 2014

Recipe: Chickpea Curry


This chickpea curry is fragrant and filling.

My chickpea curry, which is based on the Indian dish Chole, has great texture and is very filling when paired with rice or eaten with naan or tortillas. It’s also very simple to make.


If you can, purchase a seasoning blend called Pitta Churna (it can be bought online and at Amazon.com). It contains a blend of fragrant organic spices that are a wonderful addition to your diet. I use this seasoning blend in my chickpea dish.

Chickpea Curry

Ingredients:
1 T oil
1 large onion, chopped
2 cloves of garlic, chopped
1-inch piece of ginger minced or 1 T of garlic paste (you can buy this at Indian grocery stores)
1-1/2 T of Pitta Churna
1 can (1 pound-13 oz or 822 grams) of chickpeas, drained and rinsed
¾ c. to 1 c. of vegetable broth
1 T organic sugar
Juice from half a lemon
1-2 T of vegan buttery spread

Directions:

Heat the oil on medium heat and add the chopped onions. Sautee for 3 minutes. Add Pitta Churna and cook for 1 minute. Add the garlic and ginger and cook for another minute. Add the chickpeas and cook for 3 minutes, mixing every 30 seconds or so. Add ¾ c. of veggie broth and bring to a boil. Lower the heat, cover the pot, and simmer for 10 minutes. Remove the lid, add the sugar, stir and taste. I added a couple big pinches of salt to my pot and a large pinch of black pepper (black pepper paired with turmeric increases the anti-inflammatory properties of turmeric). Add the juice of half a lemon and 1 T of vegan buttery spread (you can add another tablespoon of vegan butter if you like your dish creamy). Stir and taste. Adjust the seasonings to your liking – either adding a small dash more of sugar, salt, or Pitta Churna. Let the mixture cook another five minutes and then serve with rice, naan, or tortillas. Garnish with a little cilantro, red chili flakes, chopped hot peppers, hot sauce, or siracha.

The sauce is creamy, sweet, and fragrant. The chickpeas have a bit of chew to them, while the onions still have a crispy bite.